Finally, press F10, select Yes to save the changes, and your system will reboot automatically.
Essential Steps to Enable Secure Boot on Your PC
08/14/2025
Since this involves BIOS settings, proceed with caution—incorrect changes may prevent your computer from booting.
Steps may vary slightly depending on your motherboard brand. If you're unsure, it's strongly recommended to consult a professional technician.
1. Enabling TPM 2.0
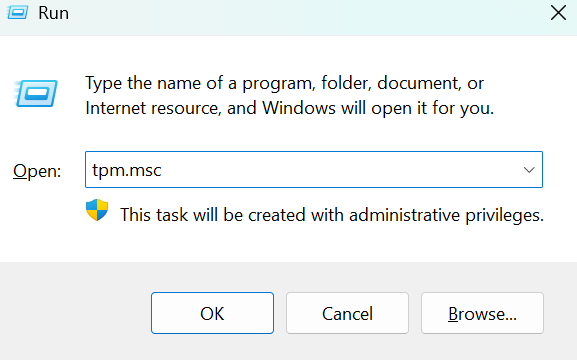
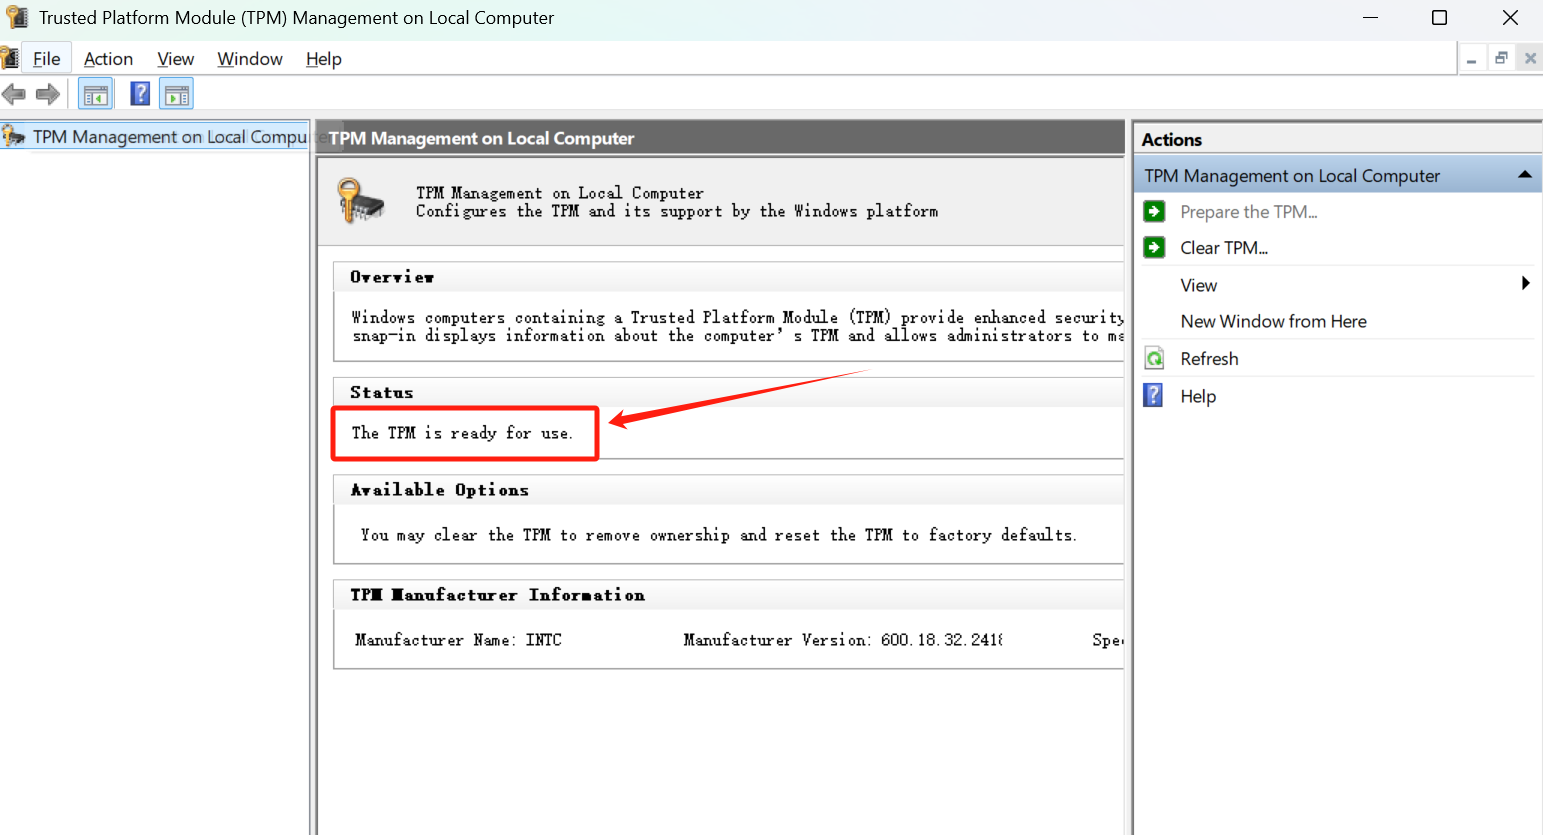
Press Win + R on your keyboard, type tpm.msc, and press Enter.
If the window shows "The TPM is ready for use", no further action is needed.


Enabling TPM requires entering your BIOS/UEFI settings. Exact steps vary by motherboard brand and platform (Intel/AMD), but you’ll typically find the TPM options under Security or Advanced settings—simply enable them.
General Enabling Steps
- Enter BIOS/UEFI
Reboot your PC and press the designated key during startup (e.g. Del, F2, F10—varies by motherboard) to access the BIOS/UEFI interface.
- Locate the TPM Option
Within the BIOS menus (look under “Security,” “Advanced,” or “Trusted Computing”), find the TPM-related setting (such as “Security Device,” “Intel PTT,” or “AMD fTPM”).
- Enable TPM
Change the setting to “Enabled” or “On.” On some boards, you may need to select “Firmware TPM” or “PPT” mode.
- Save and Exit
Press F10 to save your changes and exit. Your system will reboot automatically.
Brand & Platform Variations
- MSI Motherboards
Intel: Advanced > Security > Trusted Computing > TPM Device Selection → PPT
AMD: Settings > Security > Trusted Computing > AMD TPM Switch → AMD CPU TPM
- ASUS Motherboards
Intel: Advanced > PCH-FW Configuration > TPM Device Selection → PPT
AMD: Advanced > AMD fTPM Configuration → Enabled
- Lenovo ThinkPad
Security > Security Chip → Enable
2. Convert Disk from MBR to GPT
a. Check Partition Style
Press Win + X and select Disk Management.
Right-click the system disk (usually the one containing C:), choose Properties, go to the Volumes tab, and check if it shows Master Boot Record (MBR).
b. Run Command Prompt as Administrator
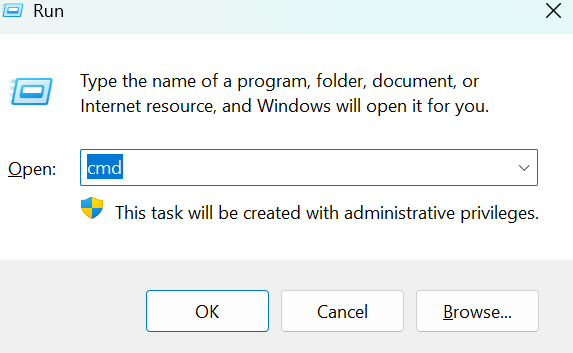
Press Win + R, type cmd, then press Ctrl + Shift + Enter to launch an elevated Command Prompt.

Enter the following and press Enter:
mbr2gpt /validate /disk:1 /allowFullOS
Note: Replace disk:1 with the disk number shown for your C: volume in Disk Management. (For example, if C: is on Disk 0, use /disk:0.)
c. Switch to UEFI Boot Mode
Reboot into your BIOS/UEFI settings and change the boot mode to UEFI (disable Compatibility Support Module/CSM).
d. Save and Reboot
Save your changes and exit BIOS/UEFI. Your system will now boot in UEFI mode from the newly converted GPT disk.
3. Set up the UEFI boot process:
Enter BIOS: Press DEL after powering on the computer.
Change mode: Press F7 to enter Advanced Mode.
Set the boot method: Navigate to Settings → Advanced → Windows OS Configuration and set BIOS UEFI/CSM Mode to UEFI or disable CSM.
Enable Secure Boot: Navigate to Settings → Advanced → Windows OS Configuration → Secure Boot, load the factory key, set it to Enable, save, and exit.
4. Enable Secure Boot
Check if UEFI Mode is Enabled:
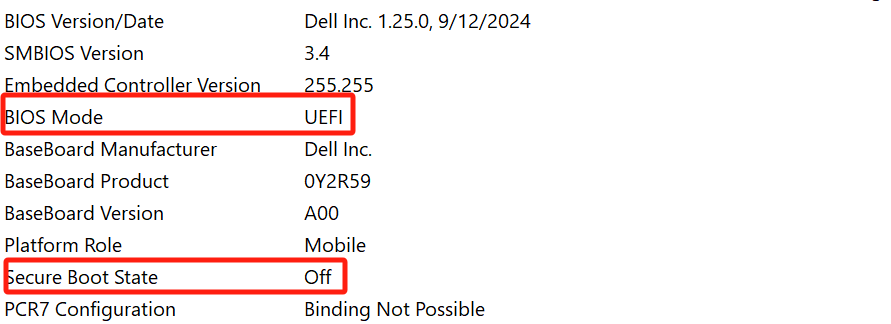
a. Press the Windows key, type msinfo32, and press Enter.

b. If Secure Boot State is listed as Off, follow the steps below.

How to Enable Secure Boot:
a. Press the Windows key, search for “Change advanced startup options”, and open it.

b .Under Advanced startup, click Restart now.
c. After rebooting, go to Troubleshoot → Advanced options → UEFI Firmware Settings.
d. Once in BIOS, navigate to the Boot menu (or similar, depending on your motherboard).
Adjust the following settings to enable UEFI mode (names may vary by manufacturer):
- Boot Mode / Boot List Option → UEFI
- Launch CSM / Compatibility Support Module → Disabled
- Secure Boot → Enabled
Было ли это полезно?
Да
Нет
Не можете найти ответ на интересующий вас вопрос?
Свяжитесь с намиМы используем файлы cookie и собираем обезличенные данные о пользователях для улучшения работы сайта, персонализации контента, анализа производительности и показа целевой рекламы. Нажимая кнопку «Принять», вы даете согласие на обработку таких данных. Подробнее.